Printed in The American Tri-Five magazine in Volume 10 : Issue 3
Whether you are building your own Tri-Five or having one built, there’s probably a couple of questions you’re wanting answers to. Such as what kind of wheel and tire combo am I going to run? How am I going to make them fit? What kind of parts am I going to need? And how do I install them? There are a few options out there on the market that will help you answer these questions and achieve the fitment you are looking for. Let’s face it, when these cars were originally built, there wasn’t a lot of thought given into what these cars would become in the future. The designers probably didn’t think that they were going to stand the test of time and become such a staple to hobbyists and hot rod lovers alike.
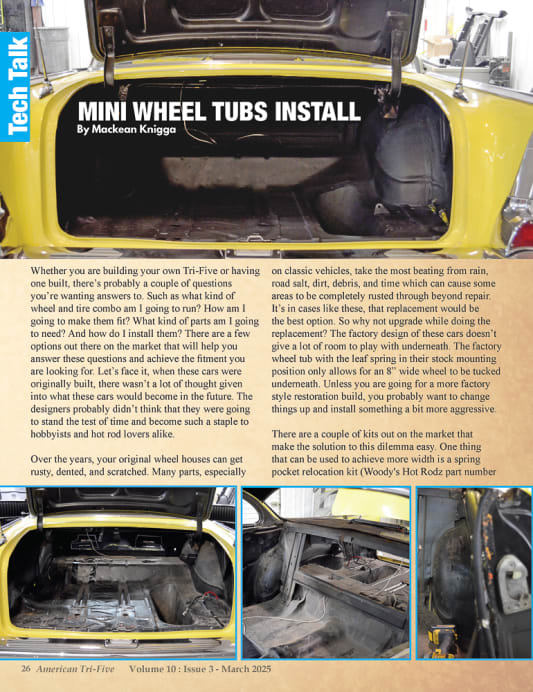
Over the years, your original wheel houses can get rusty, dented, and scratched. Many parts, especially on classic vehicles, take the most beating from rain, road salt, dirt, debris, and time which can cause some areas to be completely rusted through beyond repair. It’s in cases like these, that replacement would be the best option. So why not upgrade while doing the replacement? The factory design of these cars doesn’t give a lot of room to play with underneath. The factory wheel tub with the leaf spring in their stock mounting position only allows for an 8” wide wheel to be tucked underneath. Unless you are going for a more factory style restoration build, you probably want to change things up and install something a bit more aggressive.
There are a couple of kits out on the market that make the solution to this dilemma easy. One thing that can be used to achieve more width is a spring pocket relocation kit (Woody's Hot Rodz part number WHR-10235). What this kit does is remove the leaf spring mounts from their factory location on the outside of your frame, and moves them to a new spot underneath the frame. This kit can be used with factory style wheel tubs, allowing you to be able to fit up to a 10” wide wheel. It also includes pockets, brackets, bushings, and hardware.
Say you’re wanting to go even wider. That's where the extended inner wheel tubs come in (GDS-WH13-551TP). These will widen the inner trunk wheel wells by 2 ⅝” on both sides, while keeping a factory OEM look. This kit when paired with the spring pocket relocation kit can allow you to fit a 13” wide wheel underneath. Both of these are available for you '55, '56, or '57. They do come pre-flanged from the manufacturer for easy welding into the pre-existing trunk walls. For convertible owners, don’t worry, these can be custom fit to work on those models as well. These tubs do come EDP coated to prevent rust and provide a cleaner restoration overall.
This project is going to include some hot work such as cutting, grinding, and welding. All of this should be done in a well ventilated space. Let’s start with disassembly. First, remove any parts that can get damaged from any sparks and remove any interior pieces from the vehicle and trunk. Use protective welding blankets to cover anything else that needs protection that cannot be removed, such as painted surfaces. Based on the stature of the build and its current progress, these steps could vary. If there is a rear seat inside, then it will need to be removed to gain access to the work area. Now that everything is removed, we will dive in to the process.
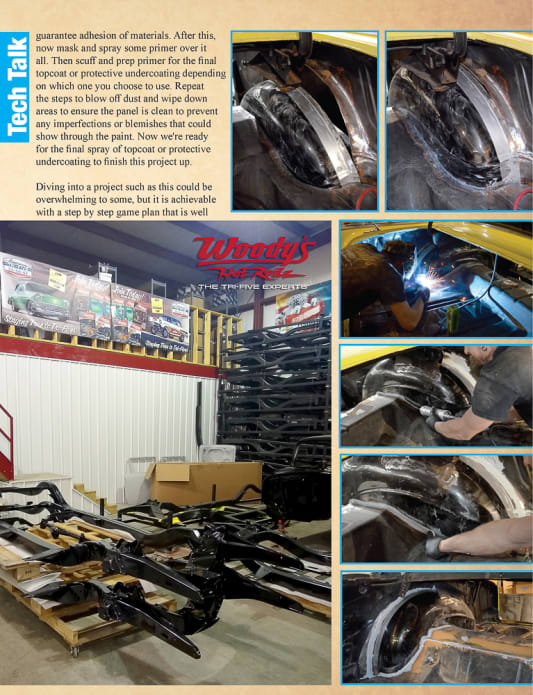
Start off by removing the rear seat brace, this piece will require some modification in order to be reinstalled. Next, cut out the inner wheel tubs. Keep in mind, the new ones are larger, it will require removal of part of the trunk floor as well. These inner extended wheel tubs will extend the space by 2 ⅝” on both sides. Upon completion, it's time to prep all of the edges and test fit the new panels. Once everything is set in its rightful place and fitment is where it needs to be, it will all need to be welded in. After buttoning up the wheel tubs in the trunk, now it’s back to the rear seat brace. Begin modifying it by shortening it to accommodate the new wheel tubs. Once modifications are complete, reinstall and weld it back into the car.
Now we are getting somewhere. We have the new tubs and modified seat brace installed. This means preparation can start for the finishing touches. All welds will get coated with a bead of seam sealer and smoothed out to ensure coverage of all the weld seams. This will provide an extra layer of protection from corrosion. After this, fully prep all panels within the work area. Now, blow off all dust and fully wipe down all the areas to ensure they are clean. This will guarantee adhesion of materials. After this, now mask and spray some primer over it all. Then scuff and prep primer for the final topcoat or protective undercoating depending on which one you choose to use. Repeat the steps to blow off dust and wipe down areas to ensure the panel is clean to prevent any imperfections or blemishes that could show through the paint. Now we're ready for the final spray of topcoat or protective undercoating to finish this project up.
Diving into a project such as this could be overwhelming to some, but it is achievable with a step by step game plan that is well thought out. Metalworking and fabrication has always been a tedious and challenging task, but it's also a fun one to tackle in my experience. Building one of these cars is like building a puzzle and every part of the process is just another piece to help us get to the big picture at the end.