
Woody's Hot Rodz 4-door to 2-door Conversion
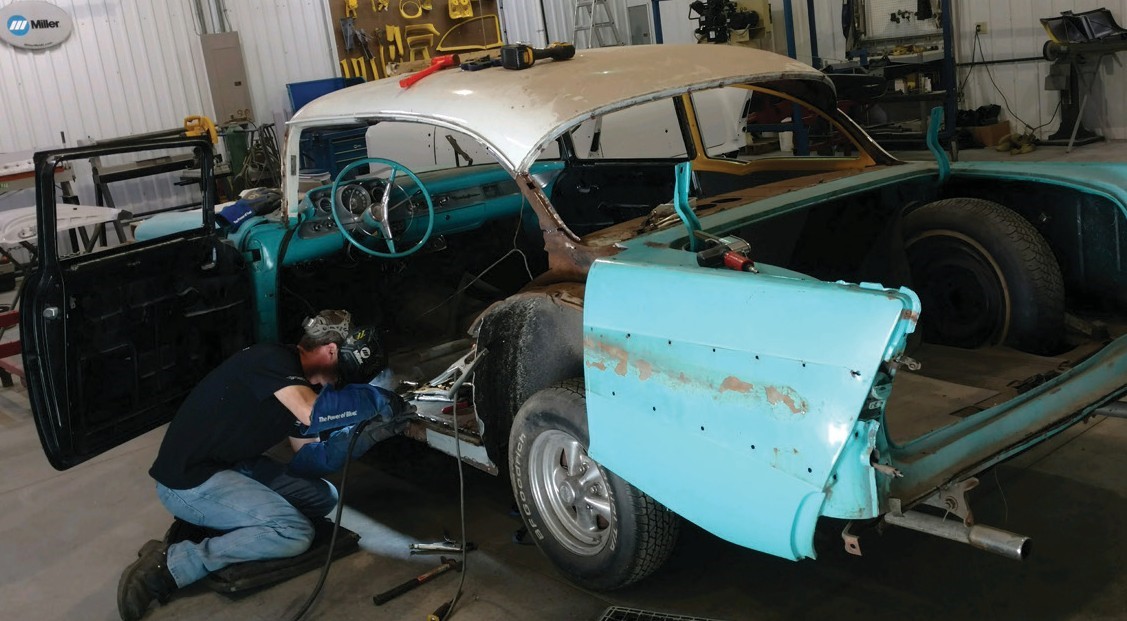
In our last installment, we gave a pretty broad overview about the 4-door to 2-door conversion, and whether or not it made sense. So, you've decided this program really for you, and you went out and found a proper 4-door sedan to start with of your favorite year. Now what?! Have no fear, we're about to show you! In this episode, we will take a full-blown step-by-step trip through the actual process with Jerry Taylor of Woody's Hot Rodz, as they convert a '57 Bel Air 4-door sedan into a proper 2-door!

Step 1: As you can see, the candidate here was just as about as good a specimen as you could ask for. Remember, the better car you start with, the better car you end up with, but the more you do yourself, the better you stand to end up financially.

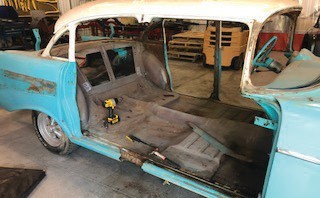
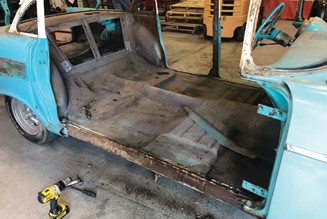
Step 2: Take it off! Getting everything out of your way is a big part of process, the less you must work around, the better. Take the time and complete the teardown all at once. On top of that, parts such as doors and 4-door specific trim pieces are swap meet bound anyways if they are still usable.
Step 3: A simple mock-up with a sec tion of original-style 2-door inner quar ter shows some of the difference in the 2-door and 4-door. Ever seen a 4-door that someone has simply welded up the back doors, and the proportions look off? This is why! The difference shown will be made up by using a proper 2-door sedan front door,and relocating the b-pillar into proper location.
Step 4: As mentioned in the last step, the b-pillar needs to be removed in order. Don't chop it to pieces, you're going to need it!
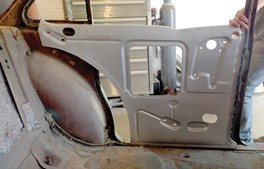
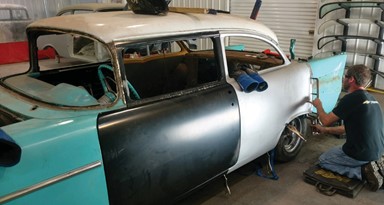
Step 5: Car you're starting with have rusty outer rockers? No worries, they're outta here anyways! The kit put together includes proper 2-door sedan outer rockers, again, all in the name of keeping pro portions correct, and being less overall work than trying to section a 4-door rocker.
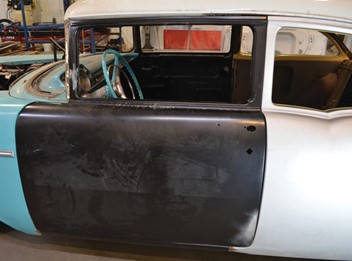
Step 6: With the pillar and rockers out of the way, you can then hang the door, and start to locate the new outer rocker. Again, this is a good visual repre sentation of how different the proportions are from a 2-door to a 4-door.
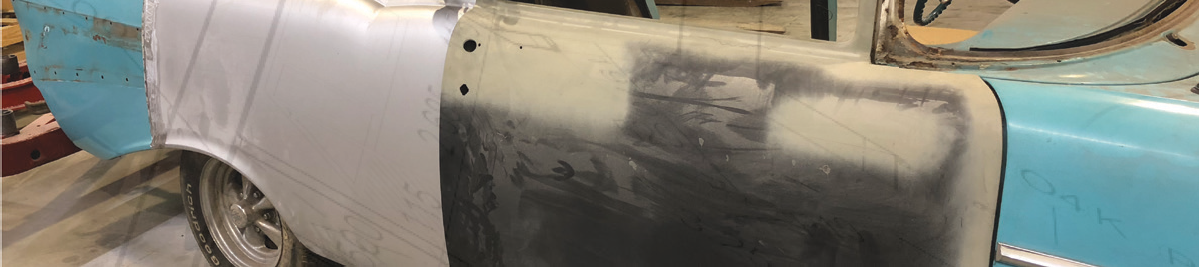
Step 7: Cut, cut, and cut some more! Just Remember during this stage, it's a lot easier to cut more off than it is to weld it back on. Mockup is key! '57 owners have an additional advantage to this conversion: Golden Star quarters are actually stamped in two sections, spotted, and seamed. If you have a car with a good fin/rear quarter section as this one was, you can separate the two sections of the new quarter, and cut the original quarter section to accommodate the new front. If the car's rusty or banged up, no worries, you've already got the entire quarter that you need to do so. When removing the original quarters, leaving a small section of the original upper quarter by the c-pillar provides ample means to mount the new 2-door quarter. Have a spot of rusty inner rocker to fix? This is the time to do it, as you have full access.
Step 8: With everything trimmed accordingly, you can then fit the new quarter into place. Notice Jerry's use of vice grips in this stage of the process, basically acting as another set of hands and ensuring the quarter doesn't move during the fitment process. The fact a sedan quarter comes with the window surround makes life easy, as an established location point is provided. Once tacked, your original b-pillar can be trimmed and fit to the new quarter. Pay close attention during fitment to your gaps, how you fit the quarter to the door ultimately will determine how even your gaps are.
Step 9: More use of vise grips to ensure everything stays put. Punching or drilling a hole in the bottom lip of the outer rocker is a trick to giving yourself an easy way to spot it to the inner rocker. Note uniform door gaps from front to back, as well as top to bottom. Take your time at this stage, the more time you spend here, the better the outcome. This will ultimately ensure how the final product fits.
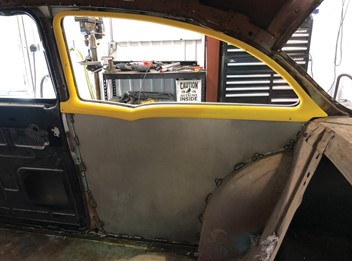
Step 10: With the outside squared away, you can move on to the inside. With the b-pillar and outer quarter in place, you will need to make a few small tabs to attach to the outer quarter to the roof, and provide a way to mount the garnish moldings. The kit from Woody’s Hot Rodz comes with 150-style fixed quarter glass and seals to simplify the conversion, and the guys at Woody’s came up with this slick custom inner quarter to rectify needing an entire factory inner quarter to complete the conversion.
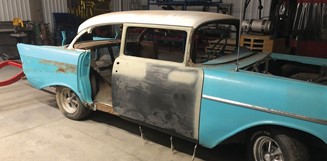
Step 11: Almost there! Here you see everything finish welded and fitted. At this point, you can test fit your mouldings, drill your holes, and make all necessary trim pieces line up exactly how you’d like them.

And the finished product! Correct proportions, and once the interior is installed, no one will be any the wiser, except the happy owner who saved a pile of money by starting with a few too many doors.
To order your Conversion kit, visit HERE.
For a printable version of instructions, visit HERE.
Brought to you by the American Tri-Five Association.