Product Search
Manufacturers
Email Newsletter
Woody's Projects
In the Press
Start Your Build
|
Tech Talks Installing Ridetech's Complete Steering Kit
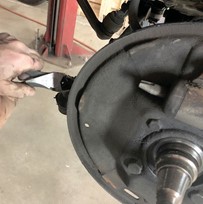
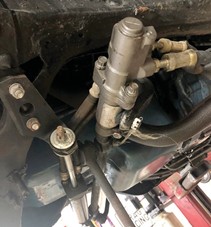
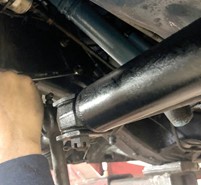
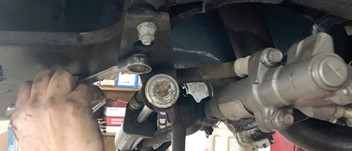
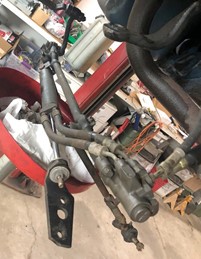
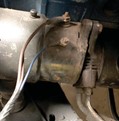
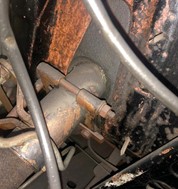
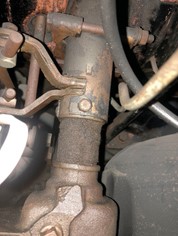
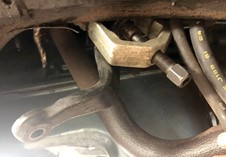
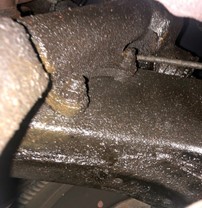
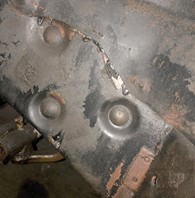
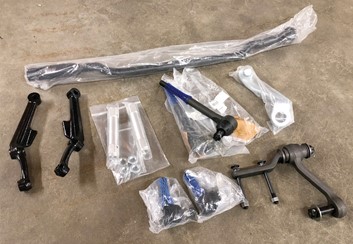
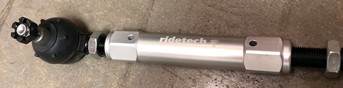
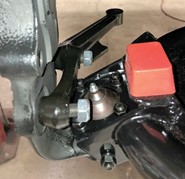
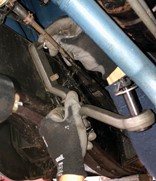
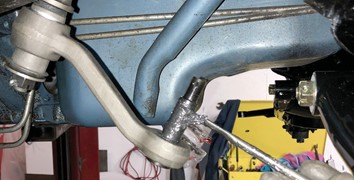
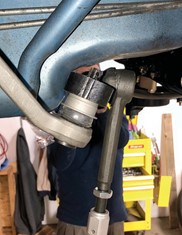
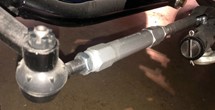
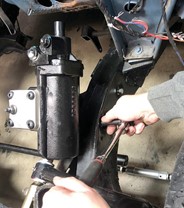
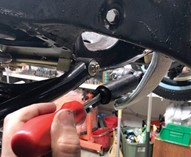
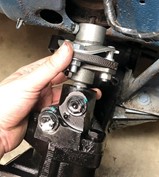
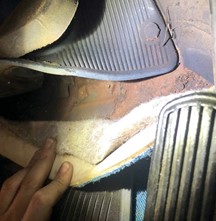
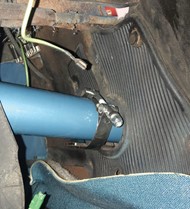
All too often we spend copious amounts of time scrutinizing certain areas of our tri-fives while overlooking basic components directly attached to said parts. In our last article, we focused mainly on the suspension for the Del Ray. We hinted throughout that article that we’d be looking at the steering system in articles to come, and now is the time! Time after time, those shiny new control arms, fancy coilovers, and state of the art brakes get hooked to a 60 year old steering system, and many of the benefits in drivability get lost in the mix thanks to worn tie rod ends, deteriorated bushings, and out-of-spec steering boxes. So, we’ve taken the liberty of updating the steering with Ridetech’s Complete Steering kit (Part number ART-02017096). This kit consists of everything you’d need to replace your entire steering setup, including a new drag link, idler and pitman arms, inner and outer tie rod ends, new steering arms, and Ridetech’s billet tie rod adjusters. The kit comes standard with a Delphi 600 box, but we opted to use the tried and true CPP 500, as we had one on the shelf. Along with the mechanicals of this setup, we’ve taken this opportunity to upgrade the column as well with a new column now available from Woody’s - The Tri-Five Experts. These columns feature all the options you could possibly want at a fraction of the price of the competition. Where they come in chrome and black finishes as well, we opted for the plain steel option so we could paint it to match, retaining a more original look inside the car. So, let’s get this machine steering like it should… We’ll start with disassembly. Now, you’ll notice some “background” parts of the car may jump around some throughout the article. Trust that these steps will retain continuity on your car regardless. Tie rods are the first to go so cotter pins get pulled right away. I’m a fan of using a pair of sidecutters to get a good bite and leverage against the castle nut. New tie rods will come complete with cotter pins and castle nuts. With the tie rods loose on both sides, you can simply swing them down and out of your way. Since the Ridetech kit is complete, there’s no need to worry with extra disassembly of the inners or idler. Now, if the first few pictures didn’t give it away, this is a factory power steering car, so we’ll have a few extra pieces to remove. Unlike a typical pitman arm connection (which you’ll see on the re- install), the pitman bolts onto the pressure control valve. Spinning the nut back off the stud, but not all the way off, and giving it a couple taps with a hammer should set it free. Next, take the idler free. Again, no need for further disassembly; we aren’t reusing any of this. Next comes the ram bracket. Wildly different from a modern power steering setup, the OE Power steering configuration used a directional control valve and a hydraulic ram to assist with steering effort. This setup is large, above anything, and can be extremely expensive to have rebuilt if problems present themselves. This one was in good shape, but with all the modern amenities this car is getting, the step to a “normal” power steering setup was a no-brainer. With the ram loose from the frame, you can drop the entire drag link assembly down. No need to take it apart further, nothing from this setup will be reused, even if you have a manual steer car to start with. Factory power steer cars use a generator driven pump. Since the Del Ray is getting an LS3, this is one more part we won’t be reusing. We’ll go ahead and remove the power steering lines at this point, and get the entire steering linkage out of the way. With the steering linkage out of the way, we’ll go ahead and remove the column. The C-shaped bracket under the hood and firewall bracket will need to be removed and will not be reused with the aftermarket column to come. After the firewall bracket is removed, the dust cover/felt seal can be taken loose, and shift linkage disconnected, if still in place from the factory. From there, the upper column retainer inside the car is removed. I won’t show pulling the steering wheel, mainly because there’s way too multiple options out there for wheels/adapters. Use a steering wheel puller to remove whatever wheel you have, unplug the harness at the column, remove the upper bracket, and slide the column off the steering shaft. With the column itself gone, you’ll need to remove the pitman arm. You’ll need as much room as you can to maneuver the box, as the steering shaft is all one piece, unlike the CPP 500 or Delphi 600 box replacing it. If you don’t have a pitman arm puller in your arsenal, the rent- a-tool program at any of your local parts houses should be able to help. Time for this old leaker to go! Remove the nuts holding the steering box on, and tap the nuts out Original steering boxes were thru-bolted using carriage-head bolts. You won’t need them, the new box is threaded, and provides you the hardware to do such. Simply remove the bolts, and angle the steering box and shaft so you can remove it. Time for some new goodies! All parts provided in the Ridetech kit are high quality pieces, and made to last. This shot shows Ridetech’s wild billet aluminum tie rod adjusters. No worries of deflection or contamination here, these dudes are solid! I like to pre-assemble the setup on the bench before install to verify fitment, and help with ease of installation. The kit also provides new steering arms. These aren’t typically an item to wear out, but with doing all new components, it’s additional peace of mind. New hardware for the steering arms is provided, but some brands of drop spindles, such as the CPP units, use a flush mount allen bolt instead. Armed and dangerous! Now that your steering arms are on the idler arm is next As with many of the suspension pieces, a generous helping of silicone grease on the idler bushing is a good idea and will keep all pieces moving free. If you feel like upgrading this area even further, have the guys at Woody’s add on CPP’s idler bearing conversion kit (part number CPP-5557IBC). Once you’ve got either your bushing or bearings on, you can hang the steering linkage you assembled.
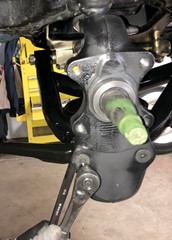
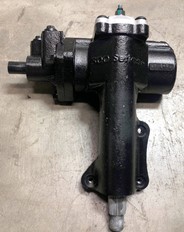
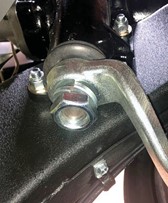
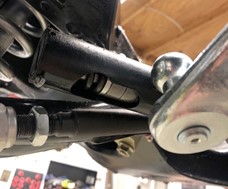
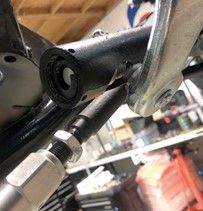
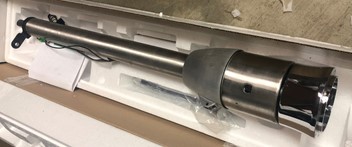
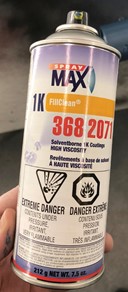
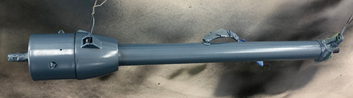
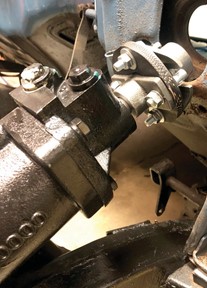
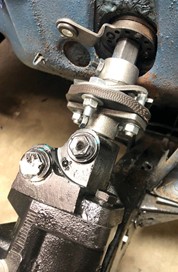
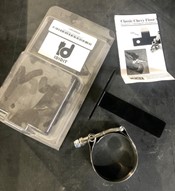
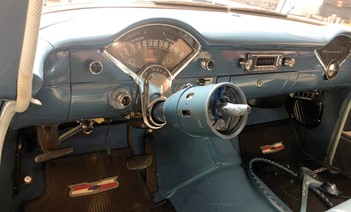
Now, you can re-attach your tie rod ends. I typically fit everything without all the cotter pins, hand tight at first. Just make note to run back over everything and tighten/pin it all before you hit the road! As stated earlier in the article, we opted to use a CPP 500 box instead of the standard Delphi 600 that comes with the kit, as we had one on hand. Both boxes are an excellent choice, and similar in design. I’ve personally used both with great results. Installation of the box is extremely straight forward. It bolts in the factory position, using provided hardware. As I mentioned earlier, the box is threaded, so it no longer uses the factory carriage bolts. Box is in, it’s time for the final arm: the pitman! I like a good coating of anti-seize on the threads and splines. The arm is notched for reference during installation. The boxes typically come centered but installing the arm and running it through its range of motion is never a bad idea. The center link attachment point consists of spring loaded cups that fit around the ball on the pitman arm. You’ll remove the cotter pin, and use a flathead screwdriver the run the retainer out in order to install the drag link to the pitman arm. You’ll move the steering linkage back and forth in order to get the ball in and over towards the passenger side in its intended location. Note: There is indeed a dust shield/ seal used here around the pitman arm ball, we simply didn’t have one on hand, since our subject was a power steer car to begin with. If yours is in good shape, feel free to reuse it, or add DAN-10164 to your order for a fresh one. With everything in place, you’ll re-install the retainer, pre- loading the spring inside and re-install the cotter pin. This area is adjustable for variances in the pitman ball and for wear. Since the steering linkage is now complete, we’re moving along to our column. These new columns, available from Woody’s, feature a 5 position tilt, a 9-bolt steering adapter (but will accept any OE wheel or applicable 3-bolt style) and available column shift option. They come in chrome, black powdercoat, and bare steel, which we chose so we could keep the Del Ray looking as stock as possible inside If you have a local paint supplier, chances are they can mix up an aerosol to match whatever your paint code is. Keep in mind, this isn’t Krylon, this is real paint, the same paint the pros use. The Spraymax 1K is our local choice, and we base/cleared this one in factory Glacier Blue. Take your time in masking this up, the more paint you can keep off everything, the better. Same can be said for prep: a good scuff on the column before primer and some wetsanding before color will yield better results than simply spraying away. The end result turned out excellent, with professional products yielding a professional result, even from an amateur bodyman as myself. With the column prepped, we move back to the box. A Borgeson rag joint will be used to join the two together. Our steering box uses a ¾-30 spline, while the column is 1” DD. Now, here’s one noteworthy part that’s a common talking point for me when it comes to columns: Keep in mind, EVERY CAR IS DIFFERENT. Read that one more time, just to be 100% clear. Everything from frame variances, to body mount sag over time, to new body mounts being taller, to the body being slid back or slid forward, there are multiple points that can all affect this column and rag joint fitment. You see how close our application is but does still work. There may be some modification required for your application, no matter what product you use. The rag joint has two set screws on the column side: one intended to push against the DD shaft, and a longer one to thru-bolt the shaft to act as a safety. Many will not run the thru-bolt, but I always do as additional peace of mind. If you do wish to run the thru-bolt safety screw, you will simply need to mark the column once you have it fitted in place and drill to accommodate. Special note: Make sure you slide on your column seals before installing your column, so you won’t have to uninstall after everything is all together. Ask me how I know to do this…… The column is supported from the floor via an IDIDIT floor mount, part number IDT- 2401400010, and the factory upper column mount The IDITIT mount uses the factory outer column support nuts in the toe board, only this time on the inside, shown here. With the column in place, affix the factory upper column mount, and use the supplied t-bolt clamp to bolt the column down to the support. Install your steering wheel of flavor and connect your wiring (there’re kits available for plug-and-play here depending on your harness), and you’re done on the inside. Out under the hood, you’ll need to connect your shift linkage (if you have one), and run power steering lines in according fashion to whatever engine you’ll be using (you’ll see this at a later date with this project utilizing Billet Specialties braided hose kit). As with any steering/suspension upgrade, a trip to your local alignment shop will be in order, and you’ll be enjoying the benefits of solid, upgraded steering in no time! |